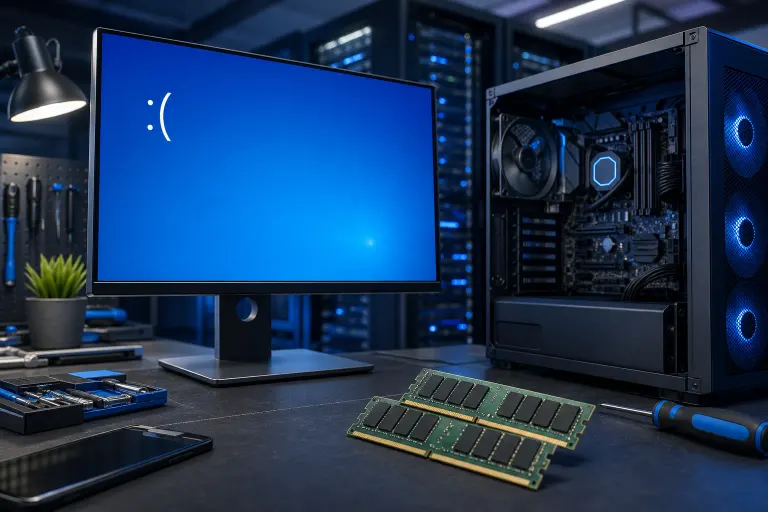
Why Your PC Blue Screens After a RAM Upgrade
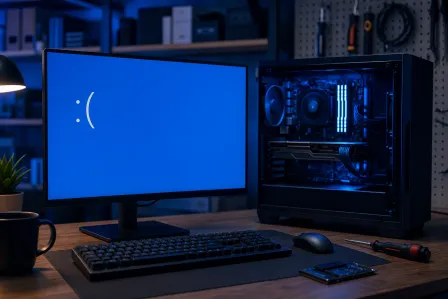
Your PC blue-screened after a RAM upgrade because something changed at the hardware level, and Windows is now catching the fallout. The usual suspects are a loose module, incompatible memory, mixed RAM kits, unstable XMP or EXPO settings, or a bad stick. Windows is not being dramatic. It is reporting that the plumbing is leaking.
Do not keep rebooting and hoping it develops character. Shut the machine down, work through the checks below, and test one change at a time.
What you need
- A Phillips screwdriver if your case needs one
- A clean, well-lit workspace
- Your motherboard or PC model number
- Access to the motherboard manual or manufacturer support page
- A USB drive if you need to run a bootable memory test
- A little patience. Not much, but some.
Before touching anything, shut down Windows fully, turn off the power supply switch if your desktop has one, unplug the power cable, and hold the power button for several seconds. Touch bare metal on the case before handling RAM to reduce static risk. Do not work on carpet if you can avoid it. South Florida humidity may make the air feel like soup, but static can still happen.
If this is a laptop, the process can be more involved because the memory may be under the bottom cover, shielding, or even soldered in place. If you are not comfortable opening it, use a local laptop repair service rather than snapping a plastic clip and buying yourself an expensive lesson.
1. Read the blue-screen stop code, but do not worship it
When Windows blue-screens, it may show a stop code such as MEMORY_MANAGEMENT, PAGE_FAULT_IN_NONPAGED_AREA, IRQL_NOT_LESS_OR_EQUAL, or SYSTEM_SERVICE_EXCEPTION. These can point toward memory trouble, but they are not a courtroom verdict. Drivers, storage problems, and unstable CPU overclocks can produce similar errors.
Write down the exact stop code if you can. Also note when it happens:
- Immediately when Windows starts
- Only when gaming or rendering
- During idle use
- When waking from sleep
- Only after enabling XMP or EXPO
A crash immediately after installing RAM is a strong clue. A crash only under load often points to a memory profile or speed setting that is not stable. That is particularly common with high-capacity DDR5 kits and four populated memory slots. More sticks do not always mean more happiness. Motherboards are fussy little bureaucrats.
2. Confirm the RAM is actually compatible
Start with the boring facts. They solve more problems than random driver downloads ever will.
Check your motherboard or computer model and verify:
- DDR generation. DDR4 and DDR5 are not interchangeable.
- Maximum supported memory capacity.
- Supported module capacity per slot.
- Whether the system uses desktop DIMMs or laptop SO-DIMMs.
- Whether it expects non-ECC or ECC memory.
- The recommended slots for two modules.
A RAM stick can physically resemble the right type and still be a poor match. Prebuilt systems, especially compact desktops, can have BIOS limitations or unusual memory requirements. Some systems are especially touchy about high-density modules or certain speed ratings.
For a custom-built desktop, check the motherboard maker's memory support list, often called a QVL, if one is available. A kit not listed is not automatically bad. It simply means the manufacturer may not have tested that exact kit. The safest route is a matched kit that meets the board's documented specifications.
Do not assume that a faster advertised speed will run automatically. RAM packaging often lists an overclocked profile speed, not the basic default speed. That distinction matters.
3. Reseat the new RAM correctly
A partially seated DIMM can look installed right up until it ruins your afternoon. Power down the PC again, unplug it, and remove the new module or modules.
Inspect the gold contacts. They should be clean and free of fingerprints, packaging debris, or damage. Do not scrub them with a pencil eraser. That old internet advice needs to be put in a box and buried behind the shed.
Line up the notch on the RAM with the slot. It only fits one way. On most desktop boards, open the retaining clips, press straight down evenly on both ends of the module, and make sure the clips lock into place. Some boards have a fixed clip on one side. That is normal.
If you installed two sticks, use the slots specified in the motherboard manual. On many four-slot boards, that is commonly the second and fourth slots from the CPU socket, often labeled A2 and B2. Do not guess because the slots are color-coded. Read the manual. Color coding is not a legal contract.
Then boot the system with only the new RAM installed if possible. If it starts and runs normally, add the other module later. If it does not boot, move on to individual-stick testing.
4. Test one RAM module and one slot at a time
This is the step most people skip because it takes time. It is also how you find the actual bad part instead of blaming every component in the room.
If you have two new sticks:
- Install only stick A in the primary recommended slot.
- Boot the PC and see whether it reaches Windows.
- Run a basic memory test, explained below.
- Shut down and repeat with stick B in that same slot.
- If both work alone, test them together in the recommended paired slots.
- If one stick fails in multiple slots while the other works, that module is likely defective.
- If both sticks fail in one particular slot but work in another, the issue may be the motherboard slot, CPU socket contact, or board configuration.
If you added new RAM to old RAM, test the old kit and new kit separately. Mixing kits is one of the most common causes of post-upgrade blue screens. Same brand, same speed, same capacity, and matching heat spreaders do not guarantee the memory chips, timings, voltage, or internal layout match.
The reliable fix is usually to use one matched kit, purchased together and rated as a kit for the total capacity you want. Two separate 16 GB kits are not necessarily equivalent to one 32 GB kit. Yes, it is annoying. No, arguing with the PC will not change the electrical behavior.
5. Reset BIOS settings and turn off XMP or EXPO temporarily
XMP and EXPO are memory profiles stored on the RAM that tell the motherboard to run it at higher advertised speeds and tighter timings. They are useful when stable. They are also frequent troublemakers after an upgrade.
Enter the BIOS or UEFI setup during startup. The key is often Delete, F2, or another key shown briefly on screen. First, load the default or optimized default settings, save, and restart. This removes old memory tuning, manual voltages, and related overclock settings that may no longer fit the new modules.
Then leave XMP, EXPO, DOCP, or any similarly named memory profile disabled for the first test. The system should run memory at a conservative default setting. If the blue screens disappear at default settings, the RAM itself may be fine, but the profile is unstable with your board, CPU, module count, or BIOS version.
At that point, you have options:
- Keep the stable default setting if reliability matters most.
- Update the BIOS, then try the profile again.
- Use a lower supported memory speed.
- Replace mixed memory with a matched kit.
- Ask a technician to tune and test it properly.
Do not start changing voltage values from forum posts written by a fellow named “RAMLord420.” Manual memory tuning can help in experienced hands, but random settings can create instability, data corruption, or a PC that will not boot.
Computer acting up? Get a real diagnosis. Book a free diagnostic
6. Update the BIOS if the board needs newer memory support
A BIOS update can improve memory compatibility, especially on newer platforms and with newer DDR5 kits. It can also go badly if you use the wrong file, lose power during the update, or decide to do it while the system is already crashing every six minutes. Pick your battles.
First, identify the exact motherboard model and current BIOS version from the BIOS screen or your system information. Download updates only from the motherboard manufacturer's official support page. Read the release notes and update instructions carefully.
If the PC is stable with one known-good stick at default settings, that is the best time to update. Do not perform a BIOS update while running an unstable memory profile. For older prebuilt desktops, confirm that the manufacturer actually offers a BIOS update for your exact model.
After the update, load BIOS defaults again, confirm the correct total memory is detected, and test at default memory settings before enabling any performance profile.
7. Run a proper memory test
Windows has a built-in memory diagnostic tool. It is convenient, but it is not the most thorough option. You can launch it by searching for “Windows Memory Diagnostic,” choosing to restart and check for problems, then reviewing the result after Windows loads.
For a more comprehensive check, use MemTest86, which runs from a bootable USB drive before Windows starts. Let it complete multiple passes if you have time. One error is too many. Memory should not produce occasional errors any more than a smoke detector should occasionally invent fires.
If the test reports errors:
- Disable XMP or EXPO and test again.
- Test one module at a time.
- Test a known-good module in the same slot.
- Check for a BIOS update.
- Replace the failing module or kit if errors follow that stick.
If errors only appear with both sticks installed, the pair may need lower settings, better BIOS support, or replacement with a validated matched kit.
8. Check Windows, drivers, and storage only after RAM is stable
A bad or unstable memory configuration can corrupt system files over time. Once the RAM passes testing at stable settings, repair Windows rather than doing it first and hoping for magic.
Open Command Prompt as administrator and run:
DISM /Online /Cleanup-Image /RestoreHealth
Then run:
sfc /scannow
Let both commands finish. If Windows still crashes after RAM tests pass, update chipset drivers and graphics drivers from the PC, motherboard, or graphics-card manufacturer. Avoid “driver updater” utilities. They are often junkware dressed as a solution.
Also check the drive's health. A failing SSD can mimic memory-related crashes, particularly if the PC blue-screens while loading games, opening large files, or installing updates. But do not jump to replacing the drive just because a stop code mentioned memory. Diagnose the changed part first.
If the PC contains important work files, back them up before extended testing. For business systems, this is where managed backup practices stop being boring paperwork and start being useful. Our backup and disaster recovery guidance covers the basics for local businesses that cannot afford to lose a week's work to one bad component.
9. Know when the upgrade needs professional diagnosis
Bring the system in when any of these apply:
- The PC will not post, beep, or display video after reseating RAM.
- Every memory stick fails, including a known-good one.
- A particular RAM slot consistently fails.
- The system crashes only when a memory profile is enabled and you need it tuned correctly.
- You see bent CPU socket pins, board damage, or liquid residue.
- You are dealing with a compact prebuilt or laptop that is difficult to open.
- Windows now has repeated crashes even after stable RAM testing.
A technician can test the modules, slots, CPU memory controller, BIOS configuration, and Windows stability without throwing parts at it. That matters. Replacing random hardware is not troubleshooting. It is gambling with worse paperwork.
For desktops in West Palm Beach and across South Florida, our computer repair team can diagnose blue screens and memory upgrades in-shop. If the machine can boot reliably enough to connect, remote support can also help with Windows checks, driver cleanup, and reviewing crash behavior. Hardware seating still requires hands on the machine. Sadly, I have not yet found a wrench that works through Wi-Fi.
Common mistakes
Installing the RAM in the wrong paired slots
Two modules often need specific slots for dual-channel operation and stability. Check the manual instead of assuming slots 1 and 2 are correct.
Mixing old and new memory kits
This is the big one. Different kits can boot, appear fine, then crash during gaming, video work, or overnight idle time. Use one matched kit whenever possible.
Enabling XMP or EXPO before verifying a stable boot
Get the PC stable at default settings first. Then enable the profile and test again. Otherwise, you have changed several variables at once and learned nothing.
Ignoring a single memory-test error
One error is not “close enough.” It can mean a bad module, an unstable profile, or a platform compatibility issue. Any of those can cause blue screens and corrupt files.
Updating the BIOS with unstable RAM installed
Stabilize the system with one known-good module and default settings first. A failed BIOS update can turn a manageable RAM problem into a no-boot problem.
Downloading sketchy driver or registry cleaners
Do not install miracle fix tools because a search result promised to repair MEMORY_MANAGEMENT in three clicks. Those programs commonly add junk, subscriptions, or more problems. Windows has enough moving parts already.
Bottom line
A PC that blue-screens after a RAM upgrade usually has a seating, compatibility, configuration, or defective-module problem. Reseat the memory, verify the correct slots, test each stick individually, reset BIOS settings, disable XMP or EXPO, and run a real memory test before blaming Windows.
If the system stays stable only at default memory speeds, that is useful information, not failure. Reliability beats a slightly higher benchmark score every time. If you are stuck with a no-boot machine, repeat crashes, or a suspicious motherboard slot, schedule a repair and let someone test it without turning your desk into a parts graveyard.
Computer acting up? Get a real diagnosis.
Fix My PC Store repairs computers across West Palm Beach. Free diagnostics, honest pricing, no upsell games.