How to Know If Your Desktop Power Supply Is Failing
TL;DR: A failing power supply (PSU) can look like a bad GPU, RAM, or motherboard problem. Watch for random shutdowns, failure to POST, and coil whine. If these symptoms persist after systematic testing, the PSU is one possible cause and should be tested alongside other hardware.
What You Need
- A Phillips-head screwdriver
- A can of compressed air (South Florida dust is no joke)
- A multimeter (optional but helpful)
- A PSU tester, if you can borrow or buy one cheaply
- A known-good spare PSU to swap-test (ideal if you have one)
- About 30-60 minutes and a clean, well-lit workspace
You do not need to be an electrician. You do need to be comfortable working inside a desktop case with the power cord unplugged.
Step 1: Notice the Pattern of the Problem
Before you touch a single screw, pay attention to what's actually happening. The PSU is sneaky. It rarely announces itself with a bang. Instead it mimics other failures.
Here are the classic PSU failure patterns:
- Random shutdowns with no warning. The PC just dies mid-task, like someone pulled the plug.
- Failure to POST or boot. You press the power button, fans spin for a second, then everything stops.
- Restarts during heavy load. Gaming, video rendering, or large file transfers trigger shutdowns. This one gets misdiagnosed as a GPU or CPU problem constantly.
- The PC won't turn on at all. No fan spin, no lights, nothing.
- Intermittent power. Sometimes it boots fine. Sometimes it doesn't. Classic aging PSU behavior.
- Burning smell or visible scorch marks. Stop. Unplug immediately. This is serious.
If your symptoms match one or more of these, keep going.
Step 2: Check the Easy Stuff First
I know, I know. But please do this before you assume the PSU is dead.
Check the wall outlet. Plug something else into it. Check the power cable from the wall to the PSU, and swap it with another IEC cable if you have one (the same type used on most monitors and printers). Make sure the PSU's voltage selector switch on the back is set correctly. In the US it should be at 115V, not 230V. Flipping that switch by accident is embarrassingly common.
Also check that your power strip or UPS is not the problem. A failing surge protector can cause the exact same symptoms as a dying PSU.
Step 3: Listen and Smell
Boot the PC if you can and listen carefully.
Coil whine is a high-pitched buzzing or squealing that can come from the PSU, GPU, or motherboard under load. It is usually not diagnostic by itself. But a new noise accompanied by instability, heat, odor, or shutdowns warrants investigation.
Fan noise changes matter too. If the PSU fan is grinding, rattling, or running at full blast constantly, the thermal management inside is struggling. A PSU fan that has stopped entirely is concerning if the PSU documentation does not specify zero-RPM operation, or if it remains stopped under conditions where the fan should run.
Smell. A healthy PSU smells like nothing. A failing one sometimes has a faint burnt or acrid smell. If it's strong, shut it down.
Step 4: Inspect for Physical Damage
Unplug the PC from the wall. Wait a full minute. Then open the side panel.
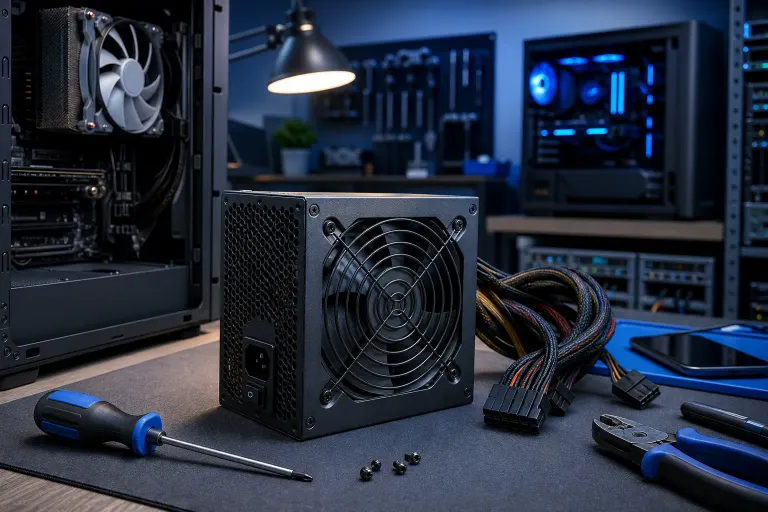
Look at the PSU itself. Any visible burn marks, bulging components near the vents, or melted connectors are instant red flags. Use compressed air to blow out dust from the PSU vents, but do not open the PSU itself. There are capacitors inside that can hold a lethal charge even after unplugging. Seriously, don't open it.
Also check your motherboard capacitors while you're in there. Bulging or leaking caps on the board can cause similar symptoms and sometimes get blamed on the PSU. They look like small cylinders with tops that are swollen or crusty instead of flat.
If you've had dust and humidity issues with your machine, our guide on computer repair has broader context on what South Florida conditions do to PC internals over time.
Computer acting up? Get a real diagnosis. Book a free diagnostic
Step 5: Do the Paperclip Test (or Use a PSU Tester)
This step tells you whether the PSU can power on independently, separate from the rest of your system.
The paperclip test:
Only attempt this if you can positively identify PS_ON and ground from the connector’s wire side and can keep the paperclip insulated and away from other pins; an incorrect or loose connection can short the PSU or connected equipment. Do not touch the paperclip while the PSU is connected to mains power; use a PSU tester or professional service if unsure.
- Unplug everything from the PSU, including all cables going to the motherboard, drives, and GPU.
- Find the 24-pin ATX connector (the big one that goes to the motherboard).
- Take a paperclip and bend it into a U-shape.
- Insert one end into the green wire pin (PS_ON) and the other into any black wire pin (Ground). These are usually pin 16 (green) and pin 17 (black) but count carefully using an ATX pinout diagram.
- Plug the PSU back into the wall and flip its switch on.
- A spinning fan only shows that the unit started; a stationary fan may be normal on a zero-RPM model. The paperclip test cannot confirm PSU health, and a no-fan result should be checked against the PSU documentation or with a proper tester/known-good PSU.
A PSU tester can provide a basic no-load check of connector voltages and power-good behavior. It plugs directly into the 24-pin connector and shows readings on a small display, but it cannot certify PSU health or replace a load test or swap test for voltage regulation, ripple, or stability under real system load.
Note: the paperclip test only confirms the PSU can start. It does not confirm it's providing stable voltages under load.
Step 6: Check Voltages Under Load with a Multimeter
If you have a multimeter and the PC actually boots, you can check the voltage rails while the system is running.
This is for users experienced with live low-voltage measurements. Do not let probes contact adjacent terminals, as bridging pins can damage components. If you're unsure, a PSU tester, known-good PSU, or professional diagnosis is safer.
The main rails you want to check are +12V, +5V, and +3.3V. Here's what acceptable ranges look like for a healthy PSU:
- +12V rail: Should be between 11.4V and 12.6V
- +5V rail: Should be between 4.75V and 5.25V
- +3.3V rail: Should be between 3.14V and 3.47V
You can also use software like HWiNFO64 or HWMonitor to check voltages through the motherboard's sensors. Keep in mind motherboard sensor readings are not always perfectly accurate. Unexpected sensor changes may justify further testing, but software readings alone cannot diagnose PSU output; confirm suspected rail problems with appropriate test equipment or a known-good PSU.
If numbers are all over the place or dip hard when you launch a game or run a benchmark, confirm the readings with appropriate test equipment or a known-good PSU before concluding that the PSU is unstable.
Step 7: Swap Test with a Known-Good PSU
This is one of the strongest practical diagnostic tests you can do short of a professional bench test.
Borrow a PSU from a friend, grab a spare from a parts bin, or pick one up from a local shop. Make sure it has adequate wattage for your system (a 550-650W unit covers most mid-range builds). Temporarily swap it in, connect all the cables, and run your PC through the same conditions that were causing problems. Use only the modular cables supplied with the known-good/replacement PSU; never reuse modular cables from another PSU unless the manufacturer explicitly confirms compatibility.
If the symptoms disappear completely, that strongly suggests the original PSU is at fault, though differences in cables, capacity, protections, or replacement-unit behavior can also affect symptoms.
If you'd rather have a professional handle diagnosis, our team at Fix My PC Store can bench test PSUs and run full hardware diagnostics in West Palm Beach.
Common Mistakes
Replacing the GPU or RAM first. Random shutdowns under load look exactly like a GPU problem. People spend $400 on a new graphics card when a $60 PSU would have fixed it. Test the PSU alongside other likely causes before purchasing replacement parts.
Ignoring intermittent symptoms. If the PC boots fine most of the time, it's easy to dismiss the occasional failure. Intermittent faults can worsen over time, but they can also indicate other hardware, cabling, outlet, or thermal problems, so test systematically.
Buying a cheap replacement. PSU quality matters more than almost any other component. A low-quality unit can damage your GPU, motherboard, and drives through voltage instability. Choose a suitably sized unit with independent professional testing or reviews, appropriate protections, and a solid warranty. An 80 Plus rating can help compare efficiency, but it is not a quality guarantee.
Opening the PSU to inspect inside. Don't. Capacitors store high-voltage charge long after unplugging. There's nothing fixable in there for a non-specialist anyway.
Skipping the paperclip test and going straight to replacement. If you can at least confirm whether the PSU starts, you'll save yourself a wasted return trip to the store.
If you're building a new system from scratch and want to make sure you start with solid components, check out our custom gaming PC builder to see how we spec power supplies for different build tiers.
For businesses running workstations or servers, power supply failures can mean data loss and downtime. If your business PCs are aging, it's worth talking to our managed IT team about proactive hardware monitoring before something fails at the worst possible moment. And speaking of worst moments, having solid backups and disaster recovery in place means a hardware failure doesn't become a catastrophe.
Bottom Line
The power supply is the component that everyone forgets until it kills everything else. A failing PSU can disguise itself as a GPU failure, RAM problem, or even a corrupted OS. The trick is recognizing the pattern, doing systematic tests from simple to complex, and not jumping straight to expensive parts replacements.
If you've gone through these steps and you're still not sure, or if the PC simply won't run long enough to test, bring it in. Our shop in West Palm Beach does hardware diagnostics and can pinpoint whether it's the PSU or something else. Book a repair and we'll figure it out.
Computer acting up? Get a real diagnosis.
Fix My PC Store has repaired thousands of machines across West Palm Beach. Free diagnostics, honest pricing, no upsell games.