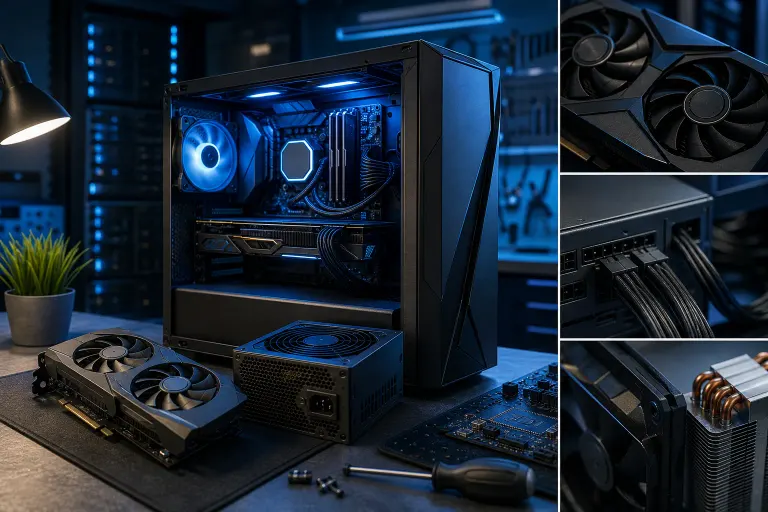
Gaming PC Crashes Only During Games? Diagnose GPU, PSU, Heat
Your PC idles fine, browses fine, maybe even edits video fine. Then you launch a game and, boom, black screen, reboot, freeze, or desktop crash. That pattern matters. Gaming creates a combined GPU, CPU, memory, and power load that everyday tasks rarely hit.
Start with the crash behavior, temperatures, and recent changes. Do not shotgun-replace components. A repeatable test plan can tell you whether you are dealing with GPU instability, a power-delivery issue, heat, memory, drivers, or a spicy overclock that needs to chill.
What you need
- A way to record temperatures, clock speeds, and power behavior, such as HWiNFO.
- Your GPU driver's current installer from NVIDIA, AMD, or Intel.
- A benchmark or game with a repeatable demanding scene.
- A Phillips screwdriver and compressed air, if you will inspect the inside of the case.
- A notepad or phone to record exactly what happens, including the game, time to crash, temperatures, and any error message.
- Optional but useful: Windows Reliability Monitor, Event Viewer, and a bootable memory-test tool.
Before opening the case, shut the PC down, switch off the power supply if it has a rear switch, and unplug it. Touch grounded metal before handling components. Never open a power supply itself. Capacitors can retain dangerous charge even when it is unplugged.
1. Identify the type of crash before changing anything
The way the PC fails is your first clue. “Crashes in games” can describe several completely different problems.
A full reboot or instant shutoff under load often points toward power delivery, severe overheating, or a hardware-level fault. If the system powers right back on but Windows reports an unexpected shutdown, do not assume the PSU is guilty yet. It is a strong suspect, not a verdict.
A black screen while sound continues, followed by a recovered desktop or a driver error, leans more toward the GPU, driver, display connection, or GPU power path. If the monitor says “No Signal” and the PC remains on, check whether the game audio or Discord voice chat is still alive.
A game-only crash to desktop with Windows still working can be caused by corrupted game files, anti-cheat conflicts, overlays, driver trouble, unstable RAM, VRAM pressure, or an overclock that only fails at a certain workload.
A full freeze, where even audio loops and you must hold the power button, can involve GPU drivers, RAM, CPU instability, motherboard issues, or heat. Write down whether it happens in one title or several. One game is often software or game-engine specific. Multiple demanding games make a system-level issue more likely.
Open Reliability Monitor by searching for “reliability” in the Start menu. It gives a simple timeline of critical events and app failures. Event Viewer can add context, but do not panic over every warning. A Kernel-Power event usually confirms that Windows lost power or was forced off. It rarely tells you why.
2. Return every overclock to known-stable settings
This step is not boring. It is free diagnostic FPS insurance.
Enter your BIOS or UEFI and load optimized defaults, then save and restart. If you have enabled CPU overclocking, PBO tuning, undervolting, manual RAM timings, or a GPU overclock, temporarily remove it. In GPU software, click reset on any custom core clock, memory clock, voltage, power-limit, or fan profile.
Memory profiles deserve special attention. XMP, EXPO, and DOCP are technically overclocked memory settings, even when the kit is sold with that speed on the box. Most systems run them perfectly, but a marginal CPU memory controller, old BIOS, mismatched RAM kit, or aggressive profile can become unstable only in games.
Test with memory at default settings first. If crashes disappear, re-enable your memory profile and test again. If the crash returns, update the motherboard BIOS from the board maker's official support page, then consider a slightly lower RAM speed or more conservative settings. Before updating, verify the exact motherboard model and revision, use only the manufacturer's firmware and instructions, ensure stable power, and never interrupt the update. If you are not comfortable performing a BIOS update, seek professional help. Do not copy random voltage values from a forum. RAM tuning can be awesome, but stability is the final boss.
Also disable overlays for one test session. This includes Discord overlay, Steam overlay, GeForce Experience or NVIDIA App overlay, AMD Adrenalin overlay, Xbox Game Bar, MSI Afterburner/RivaTuner overlay, and RGB utilities with hardware monitoring. You are not declaring them bad forever. You are reducing variables.
3. Watch CPU and GPU temperatures during an actual gaming load
Do not diagnose heat based on a desktop temperature screenshot. You need numbers while the game is running and the system is working hard.
Run HWiNFO sensor logging, play the game that crashes, and check the maximum values after you exit or restart. Watch these readings:
- GPU temperature and GPU hotspot temperature, if your card reports it.
- GPU clock speed, fan speed, and board power.
- CPU package temperature and CPU clock behavior.
- CPU and GPU utilization.
- RAM use and GPU VRAM use.
Exact safe limits vary by processor and graphics card, so use the manufacturer documentation for your parts. What matters most is the pattern. A GPU that climbs rapidly near its thermal limit, runs fans at maximum, then crashes or downclocks hard has a cooling problem until proven otherwise. A CPU that repeatedly hits its temperature ceiling can throttle performance, and in severe cases may destabilize the system.
Inspect airflow with the side panel off for a brief test. If crashes stop or temperatures improve dramatically, your case airflow is likely the issue. Confirm that front or bottom fans are bringing air in and rear or top fans are exhausting it. Make sure the GPU has room to breathe. A thick carpet, a cramped cabinet, or a front panel packed with dust can turn a solid rig into a hotbox.
For air-cooled systems, check that CPU cooler fans spin, the cooler is firmly mounted, and no protective plastic film was left on a new cooler's cold plate. For liquid coolers, verify pump operation and listen for unusual grinding or gurgling. A failing AIO pump can create sudden temperature spikes under load.
Clean dust from filters, fans, heatsinks, and GPU intake areas using controlled bursts of compressed air. Hold fan blades still while cleaning so you do not overspin them. Do not blast moisture into the case. South Florida humidity makes it extra smart to keep the PC off the floor and away from leaky windows, garages, and enclosed media cabinets.
If your system needs a deeper cooling inspection, including repasting, cooler remounting, or fan layout correction, our computer repair team can test it without the parts-cannon approach.
4. Check the GPU, cables, and graphics driver cleanly
Gaming is usually the heaviest GPU workload your PC sees, so the graphics stack deserves a focused check.
First, confirm the monitor cable is plugged into the graphics card, not the motherboard video output. Reseat the DisplayPort or HDMI cable on both ends. Try another known-good cable or another port on the GPU if black-screen crashes are part of the problem. A flaky display connection can look a lot like a GPU crash.
Power down, unplug the system, and reseat the graphics card. Make sure it is fully seated in the motherboard manual's designated primary/full-bandwidth PCIe graphics slot, often the top x16-length slot, and the retention clip is engaged. Check for sag on a heavy card. A support bracket is not just for looks when a huge GPU is hanging off the motherboard like a chrome-plated brick.
Inspect GPU power connections. Every connector should be fully inserted, with no visible gap and no melted, warped, browned, or loose plastic. If your GPU uses multiple 8-pin PCIe connectors, use separate PCIe power cables from the PSU when the PSU provides them. Do not feed a hungry graphics card through a questionable daisy-chain arrangement unless your PSU and GPU manufacturer specifically support that configuration.
For 16-pin GPU power connectors, avoid an extreme bend immediately at the plug. The connector needs to sit squarely and fully seated. If you see any heat damage, stop using the system and get it inspected.
Next, update the graphics driver directly from the GPU vendor. If the crashes started right after a driver update, try a clean installation or roll back to the previous known-stable release. Use the official installer and choose its clean-install option when available. Avoid driver-updater utilities. They often add more mystery than performance.
Test the same game after each change. If you change the driver, cable, power connection, and clocks all at once, you will have no idea which move fixed the issue.
Ready to build a rig that actually rips? Start your build
5. Test for a power supply or power-delivery problem
A PSU issue is not always “the computer will not turn on.” A weak, aging, defective, or improperly connected power supply can show up only when a game causes sudden GPU power spikes.
Start with the basics. Verify the PSU is a reputable model with enough capacity for the installed GPU and CPU. Confirm the required CPU/EPS power connector(s) specified by the motherboard manual are connected; do not confuse them with the 24-pin motherboard connector. Confirm that GPU power cables are PCIe cables, not CPU/EPS cables. They can look similar, but they are not interchangeable.
Do not use SATA-to-PCIe, Molex-to-PCIe, or other bargain adapters to feed a modern graphics card unless the GPU manufacturer specifically includes and approves the adapter. That shortcut can create heat and power-delivery trouble where you least want it.
A useful isolation test is to reduce GPU load. Cap the game's frame rate, lower resolution or graphics settings, disable ray tracing, and set the GPU power limit lower through the card's official tuning software. If the PC becomes stable only when GPU power draw is reduced, you may be looking at PSU headroom, GPU power cabling, GPU instability, or heat. It narrows the lane, but it does not name the exact culprit by itself.
Wall power can matter too. Plug the PC directly into a known-good wall outlet for testing. Remove a questionable extension strip, overloaded power bar, or bargain uninterruptible power supply from the equation. If your lights flicker or multiple devices share the same overloaded circuit, note that detail.
Do not try to diagnose a PSU by opening it, probing internal components, or trusting a cheap tester as final proof. Proper load testing requires the right equipment and experience. A good PSU can be expensive, but a bad power supply can take other components with it. That is not the kind of RGB upgrade anybody wants.
6. Rule out RAM, storage, and Windows corruption
Games can expose memory errors because they move a lot of data through system RAM and VRAM, often while the CPU and GPU are both working hard.
Run Windows Memory Diagnostic as an initial screen, but use a longer bootable memory test if you continue seeing crashes. Test with all RAM installed first. If errors appear, or if you suspect a stick or slot, test one memory module at a time in the motherboard-recommended slot. Keep notes. A pass with one stick and failures with another is extremely useful evidence.
If you recently added memory, verify that every stick is part of a validated matched kit. Two separate kits with the same advertised speed are not guaranteed to run together reliably. This is especially true with four DIMMs at high speeds.
Check storage health, too. Make sure the game drive has free space and use the SSD manufacturer's official utility to check for health warnings and firmware updates. In Steam, Epic, or another launcher, verify game files. A corrupt install typically affects one game, while a hardware problem usually follows you across multiple titles.
Repair Windows system files only after basic hardware checks. Open Command Prompt as administrator and run sfc /scannow. If it finds and repairs files, restart and retest. If crashes started after a Windows update, peripheral install, or software change, use that timing as a clue rather than coincidence.
For a guide to systematic troubleshooting beyond gaming-specific issues, see our complete computer repair guide. If your PC is crashing before you can safely work through these steps, remote support may be enough to inspect logs, drivers, startup software, and game settings without hauling the tower anywhere.
7. Stress-test one component at a time, then test the whole system
A single benchmark score does not prove stability. You want controlled tests that reproduce the failure and isolate the load.
Start with a GPU-focused benchmark or a demanding game loop. Watch for artifacts such as flashing textures, colored blocks, sparkles, geometry glitches, or sudden driver resets. Artifacts point strongly toward the GPU, VRAM, temperatures, or unstable GPU tuning.
Then use a CPU-focused stress test while monitoring temperatures. If CPU-only testing fails but GPU-only testing does not, inspect CPU cooling, CPU settings, motherboard power delivery, and RAM stability. If neither isolated test fails but a real game does, the combined load may be exposing PSU headroom, memory instability, a driver conflict, or a game-specific issue.
Finally, run a combined CPU-and-GPU load test cautiously. This is the closest synthetic approximation of a hard gaming load, and it can reveal a system that reboots only when everything draws power at once. Stop immediately if temperatures are out of control, you smell hot plastic, hear electrical crackling, or see smoke. No benchmark trophy is worth cooking your rig.
Keep test windows reasonable. A crash that occurs in five minutes is valuable. You do not need to run an unstable system for hours to prove it is unstable. Once you have a consistent result, change one variable and repeat.
8. Decide whether to repair, replace, or rebuild strategically
After testing, you should have a direction.
If high temperatures track directly with crashes, fix cooling and airflow first. If a clean driver install, removed overclock, and stable temperatures solve the issue, enjoy the recovered frames and leave the system alone for a few sessions before declaring victory.
If lower GPU power limits stop reboots, inspect the PSU, cables, and GPU more closely. A quality replacement PSU may be the right fix, but do not buy one based on wattage alone. Connector count, cable configuration, build quality, and the rest of the system matter.
If memory testing fails, replace the bad module or use a known-good matched kit. If the GPU artifacts, crashes in another PC, or fails after driver, temperature, cable, and power checks, it may need repair or replacement. Before buying hardware, get the diagnosis right. A GPU replacement should raise your FPS, not just hide an unresolved power issue.
If your current tower is a patchwork of aging parts and you want a clean upgrade path, our custom gaming PC builder can help map a balanced build around the games, resolution, refresh rate, and visual settings you actually want. If the crash includes burning smells, connector damage, repeated hard shutdowns, or an unexplained black screen across several games, book a repair visit. Those are not “keep gaming and see what happens” symptoms.
Common mistakes
- Replacing the GPU first. A bad PSU cable, unstable RAM profile, or clogged cooler can make a perfectly healthy GPU look guilty.
- Changing six settings at once. Reset clocks, reinstall drivers, swap cables, and update BIOS one at a time. Controlled troubleshooting wins.
- Using desktop temperatures as proof. The failure happens in games. Capture values during the workload that triggers it.
- Ignoring RAM profiles. XMP or EXPO can be stable for months, then become marginal after a BIOS update, new GPU, or component aging.
- Assuming a higher-watt PSU is automatically better. Quality, correct connectors, cable routing, and actual condition matter as much as the wattage label.
- Continuing to run a damaged power connector. Heat damage, melted plastic, or a loose 16-pin GPU connector is a stop-now problem.
- Testing only one game. Verify in at least two demanding titles or benchmarks before blaming hardware. One broken game install is not a full-system diagnosis.
- Forgetting the easy stuff. Reseat the GPU, check power plugs, clean dust, verify fans, and try another display cable. Simple fixes still score wins.
Bottom line
A gaming PC that crashes only during games is usually failing when load exposes a weakness. Heat, GPU drivers or hardware, power delivery, RAM settings, and unstable tuning are the big suspects. Start by restoring stock settings, logging temperatures, checking cables and power connections, then testing components methodically.
Do not let a random reboot bait you into buying parts blindly. Get evidence, change one variable at a time, and your next upgrade can go toward more FPS, more RGB, and more glorious settings cranked to ultra, not a replacement for the wrong component.
Ready to build a rig that actually rips?
Custom gaming PCs built and tuned by people who game. Tell us your budget and target frame rate.