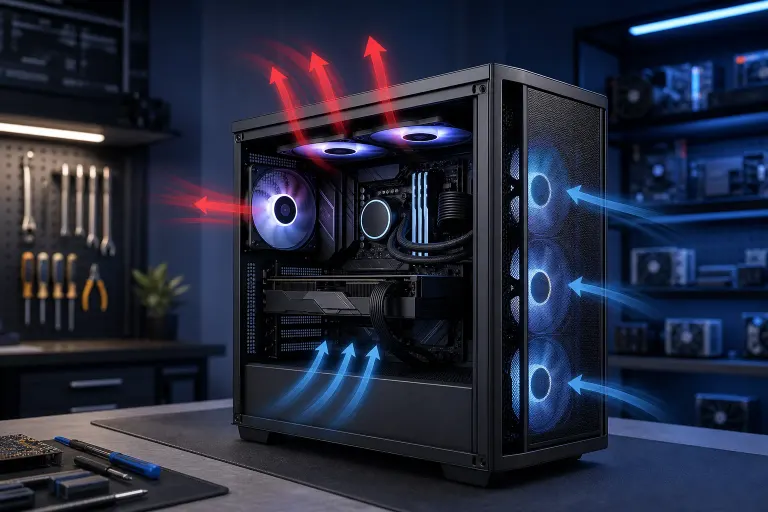
Gaming PC Airflow Explained: Case Fan Setup That Actually Works
TL;DR: Point front and bottom fans IN, point rear and top fans OUT, make sure you have slightly more intake than exhaust, and set custom fan curves. Do those four things and your temps will drop. Skip them and you're leaving performance on the table, every single session.
What You Need
Before you rearrange anything, get this stuff together:
- Your PC case with at least one empty fan mount (ideally 3+ fans total)
- Replacement 120mm or 140mm fans if your current ones are weak or loud
- A free utility like HWiNFO64 or MSI Afterburner to read CPU and GPU temps
- Your motherboard's BIOS or a fan-control app like Fan Control (by Rémi Lefebvre, free on GitHub)
- A screwdriver and maybe some zip ties for cable management
- About 30-45 minutes
You do NOT need to buy an expensive AIO or a $300 case to fix bad airflow. Most mid-towers have everything you need already. You just have to use it correctly.
Step 1: Understand the Two Jobs of Every Fan
Every case fan does one of two things: it pulls air IN (intake) or pushes air OUT (exhaust). That's it. The whole airflow meta comes down to controlling which direction air travels through your system.
Air should flow in a straight path. Cold air enters from the front and bottom, picks up heat from your radiator, CPU cooler, and GPU, then exits out the back and top. Think of it like a wind tunnel, not a blender.
To check which direction a fan blows, look at the frame. Most fans have an arrow on the side indicating airflow direction. The side with the motor hub (the center piece) is the intake side. Air gets pulled in from that side and pushed out the other.
Step 2: Map Your Case's Fan Mounting Positions
Open your case and count the mounts. Most mid-towers have:
- Front panel: 2-3 fan slots (usually 120mm or 140mm)
- Top panel: 2-3 fan slots
- Rear panel: 1 fan slot
- Bottom panel: 1-2 fan slots (some cases)
Front and bottom mounts get intake fans. Rear and top mounts get exhaust fans. Write it down if you have to. This is the foundation everything else is built on.
If your case only has one front fan and one rear fan, that's the minimum viable setup. Add more fans to empty mounts as your budget allows. Two intakes and one exhaust still beats one and one.
Step 3: Set Fan Direction Correctly
This is where most builds go wrong. Stock fans sometimes ship facing the wrong way, or someone installed them without checking. Fix it now.
Front fans: Blowing INTO the case. Fan label/hub faces outside the case. Airflow arrow points toward the inside.
Bottom fans: Also intake, blowing up into the case. Make sure your case has a dust filter here, because it will suck up every dust bunny on your floor.
Rear fan: Blowing OUT of the case. Hub faces inside the case.
Top fans: Blowing OUT. Hot air rises naturally, so top exhaust is extremely efficient.
If you have a radiator mounted to the top or front, the rad fans still follow the same rule. Rad on front = intake. Rad on top = exhaust. Don't flip it.
Step 4: Balance Intake and Exhaust (Positive vs. Negative Pressure)
Here's where airflow theory gets real. You want SLIGHTLY more intake than exhaust. This is called positive pressure.
With positive pressure, air only enters through your filtered fan mounts. Dust collects on your filters, not on your components. Easy to clean. Good for longevity.
Negative pressure (more exhaust than intake) pulls air through every gap and crack in your case. You get slightly lower temps in some scenarios, but dust builds up inside and in weird spots, fast.
Aim for a ratio like 3 intake fans to 2 exhaust fans, or 2 intake to 1 exhaust. Keep the numbers close. Going 6 intake and 1 exhaust is overkill and hurts exhaust efficiency.
For a practical example: two 140mm front intakes plus one 120mm rear exhaust is a rock-solid budget setup. Add a top exhaust later for even better results.
Ready to build a rig that actually rips? Start your build
Step 5: Set Custom Fan Curves
Default fan curves from your motherboard BIOS are lazy. Fans either run full blast (loud) or barely spin (hot). Neither is what you want.
A proper fan curve ramps fans up based on temperature. Here's a starting point:
- Under 40°C: 20-30% fan speed (silent at idle, gaming browser, Discord)
- 40-60°C: 40-60% fan speed (light load, casual games)
- 60-75°C: 70-85% fan speed (heavy gaming, rendering)
- Above 75°C: 100% (all-out cooling)
You set this in your BIOS under fan control, or through software like Fan Control. Tie your case fans to your CPU temp sensor or a combined average if your software supports it. Tie GPU fans to GPU temp through MSI Afterburner or your GPU's own software.
Test after you set it. Run a demanding game for 20-30 minutes and watch temps in HWiNFO64. CPU should stay under 85°C under full load. GPU under 85°C too. If either is higher, bump up the fan curve in that temperature range.
If you want to see how aggressively we push our custom builds, check out our custom gaming PC wizard and some of the behind-the-scenes on the Ryzen 9 9950X RGB Monster build we documented.
Step 6: Clean Up Cables for Better Airflow
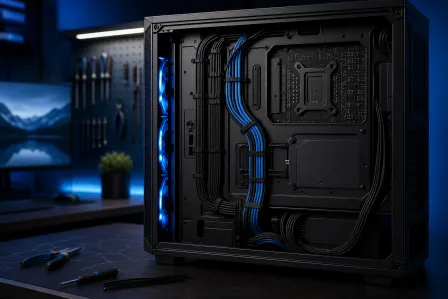
This sounds basic but it matters more than most people think. A rats' nest of cables between your front fans and your GPU blocks the airflow path. You can have perfect fan placement and still choke your temps if the wiring is in the way.
Route cables behind the motherboard tray. Use zip ties or velcro straps to keep them tight. You want the interior of the case to look almost empty from the side panel. Clear path = clear airflow.
If your case lacks good cable management routing (some budget cases genuinely don't have space behind the tray), do your best and keep cables bundled against the bottom or side.
Step 7: Verify Temps Before and After
Always benchmark before you change anything so you know what actually worked. Run your favorite demanding game or a stress test like Cinebench R23 and log your peak temps in HWiNFO64.
After you've repositioned fans, set the curve, and cleaned cables, run the same test again. Compare peak CPU and GPU temps. Most builds see a 5-15°C improvement just from correcting fan direction and adding positive pressure. Some see more.
If temps are still high after all this, the issue might be thermal paste, cooler mounting, or a case with truly bad design. We covered thermal paste in depth in a recent post. You can also schedule a repair if you'd rather have someone with eyes on your hardware diagnose what's holding it back.
Common Mistakes
Mounting all fans as exhaust. Sounds counterintuitive but people do it. No intake means scorching temps and negative pressure dragging dust through every gap.
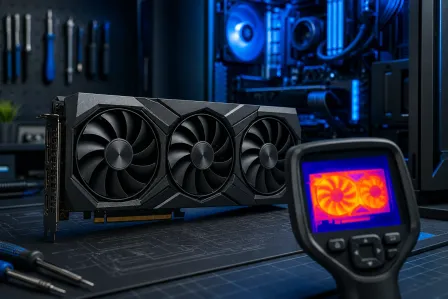
Ignoring the GPU. Your GPU generates more heat than almost anything else in the system. Make sure fresh intake air can actually reach it. A front intake fan directly in line with the GPU makes a real difference.
Running fans at 100% constantly. Loud, wears out bearings faster, and doesn't actually help much after the air exchange rate is already sufficient. Use curves.
Skipping dust filters on intake fans. If you mount a bottom intake fan and the case has no filter there, you will be cleaning your GPU cooler fins every few months. Not fun.
Over-indexing on fan count instead of fan placement. Six fans pointed randomly beats zero fans, but two fans positioned correctly beats six fans aimed at each other. Direction first, quantity second.
Forgetting to plug fans into the right headers. Case fans should connect to CHA_FAN headers on your motherboard, not CPU_FAN. CPU_FAN controls your CPU cooler separately. Mix them up and your curve settings get messy.
Also worth noting: if your system is crashing, throttling, or doing something weird that airflow tweaks don't fix, it might be a deeper hardware issue. Our team does full computer repair diagnostics and we've seen everything. We're in West Palm Beach and we also offer remote support if you just need a second set of eyes.
Bottom Line
Good airflow is not complicated. Front and bottom fans breathe in, rear and top fans exhale out, slightly more intake than exhaust, and a smart fan curve that ramps with load. That's the whole playbook.
Get those fundamentals right and your components run cooler, quieter, and closer to their actual performance ceiling. More consistent frame rates. Longer hardware life. Less thermal throttling killing your scores mid-match.
If you're planning a new build and want it done right from the start, hit up our gaming PC builder wizard and we can spec something out for you. We build in South Florida and we know what works in the heat down here. Check out some of our finished work on the Times Square Gaming PC build or the Flower Power PC if you want inspiration.
And if overclocking is the next step on your list, check out our video on whether overclocking is actually worth it before you commit. Spoiler: airflow has to be dialed in first.
Ready to build a rig that actually rips?
Custom gaming PCs built and tuned by people who game. Tell us your budget and target frame rate.