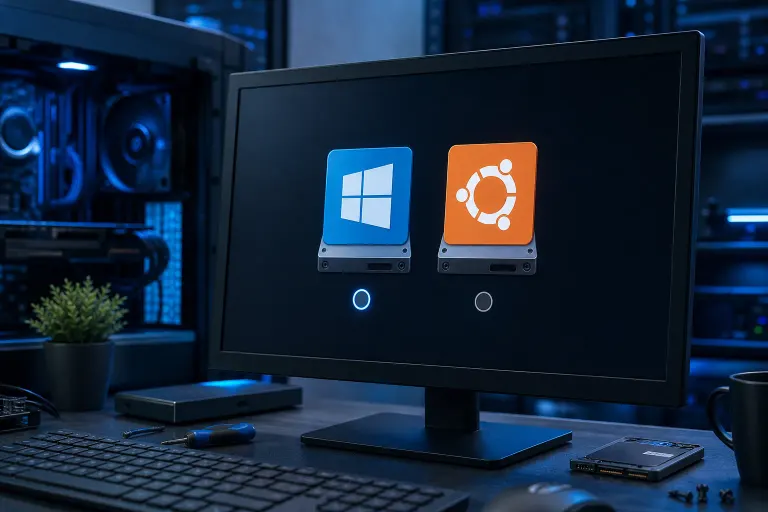
Why Is My PC Showing Two Operating Systems at Boot?
TL;DR: A dual-boot menu appears because Windows registered a second boot entry, usually after an in-place upgrade, a repair install, or a failed update. You almost certainly only have one actual OS installed. You can remove the phantom entry using the built-in Boot Configuration Data (BCD) editor or the System Configuration tool, no third-party software needed.
What you need
- A Windows PC you can log into normally
- Admin account access
- About 5-10 minutes
- Optional: a USB recovery drive, just in case
Before touching anything, note which entry actually boots your system. Let the timer count down naturally and see which one Windows selects by default. That is the keeper.
Step 1: Figure out why there are two entries
Knowing the cause tells you whether a simple cleanup is safe or whether something deeper is going on.
Common reasons:
| Cause | What happened |
|---|---|
| Windows feature update | Setup created a rollback entry and did not clean it up |
| Repair install / reset | A second Windows entry was written to the BCD store |
| Dual-boot intentional install | Someone genuinely installed two OSes on separate partitions |
| Old Windows.old folder | An upgrade left behind a recoverable previous version entry |
| Cloned drive | The clone copied the boot entry from the source disk |
Open Disk Management (right-click Start, select Disk Management) and count how many partitions are labeled with a drive letter and show a Windows installation. If you see only one NTFS volume with Windows on it, the second menu entry is a ghost and safe to remove.
If you see two separate Windows partitions of similar size, you may have an intentional dual-boot or a cloned drive situation. Do not delete entries blindly in that case.
Step 2: Open the Boot Configuration editor
Press Win + R, type msconfig, and hit Enter. Go to the Boot tab. You will see both entries listed.
Click the entry you do NOT want, then click Delete. Click Apply and OK. Windows will ask to restart. Done for most people.
If you want more control, use the command-line BCD editor:
- Right-click Start and choose Windows Terminal (Admin) or Command Prompt (Admin).
- Type
bcdeditand press Enter. You will see all boot entries with a long identifier code (like{current}or a GUID). - Find the entry you want to remove. Copy its identifier.
- Type
bcdedit /delete {identifier}replacing{identifier}with the actual code. - Press Enter. The entry is gone immediately.
Example (hypothetical): If the unwanted entry shows identifier: {ab12cd34-...}, your command would look like bcdedit /delete {ab12cd34-...}.
Computer acting up? Get a real diagnosis. Book a free diagnostic
Step 3: Set the correct default and timeout
While you are in msconfig or bcdedit, confirm the right OS is set as default and shorten or eliminate the boot timeout.
In msconfig, click your main Windows entry and hit Set as default. Change the timeout to 0 seconds if you never want to see the menu again, or 5 seconds if you want a brief window just in case.
In bcdedit, you can set the timeout with:
bcdedit /timeout 5
And set the default with:
bcdedit /default {current}
Step 4: Clean up leftover files (optional but tidy)
If the second entry was created by a Windows upgrade, you may have a Windows.old folder on your C: drive eating space. You can remove it safely through Disk Cleanup:
- Open Disk Cleanup (search for it in Start).
- Click Clean up system files.
- Check Previous Windows installation(s) and Temporary Windows installation files.
- Click OK.
This does not affect your current OS. It just frees up the disk space from the old install files.
Common mistakes
Deleting the wrong entry. If you remove the entry your system currently boots from, you will get a "No bootable OS found" error. Always confirm which entry is active before deleting the other one.
Assuming two entries means two OSes. Most of the time it is just a stale BCD record. Check Disk Management first.
Skipping a backup before editing BCD. BCD edits take effect immediately. Export a backup of your current BCD store before any changes: bcdedit /export C:\BCDBackup. You can restore it with bcdedit /import C:\BCDBackup if something goes wrong.
Touching entries on a cloned drive without checking. If you recently cloned your drive to a new SSD, both drives might still be connected. The boot menu may be showing entries from two physical disks. Disconnect the old drive before cleaning up BCD entries.
Bottom line
Two entries in the boot menu almost always means Windows wrote a backup or rollback entry during an upgrade or repair, not that you have two full operating systems fighting each other. A quick check in Disk Management confirms the situation, and either msconfig or bcdedit clears it up in minutes.
If the menu keeps coming back after you delete the entry, or if you genuinely have two Windows partitions and are not sure which one is your real install, that is worth getting a second set of eyes on. The team at Fix My PC Store on Okeechobee Blvd can sort it out without you risking your data. You can also get fast answers through remote support if you do not want to make the trip. For anything that needs hands-on work, book a visit or drop us a line.
Computer acting up? Get a real diagnosis.
Fix My PC Store has repaired thousands of machines across West Palm Beach. Free diagnostics, honest pricing, no upsell games.