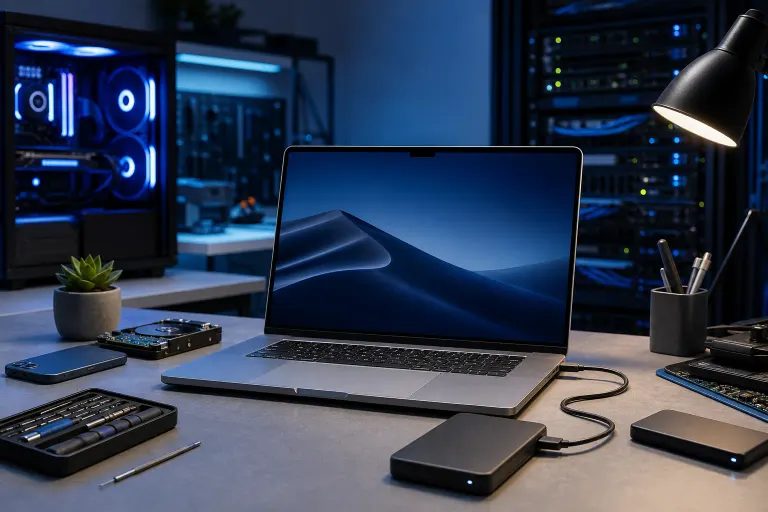
What to Do When Your Mac Won't Recognize an External Drive
TL;DR: A Mac that won't mount an external drive is almost always dealing with a cable issue, a file system it doesn't understand, or a drive that needs First Aid in Disk Utility. Run through the steps below in order. Most people solve this in under ten minutes without losing a single file.
What You Need
- The external drive and its original cable (or a known-good replacement)
- A second USB or Thunderbolt cable if you have one
- Access to Disk Utility (built into macOS, no download needed)
- A Mac running macOS 10.13 or later (steps are nearly identical across recent versions)
- About 15 minutes and a calm approach
One important note before you start: if the drive contains irreplaceable files and you hear clicking, grinding, or repetitive ticking sounds from it, stop here. A clicking drive has a mechanical failure. Running more read/write cycles on it makes professional data recovery harder and more expensive. In that case, skip to the Bottom Line section.
Step 1. Rule Out the Cable and Port
The most common reason a Mac doesn't see a drive has nothing to do with the drive itself. Cables degrade, connectors oxidize, and USB-C hubs can fail silently.
- Unplug the drive from the hub or dock and plug it directly into a port on the Mac.
- Try a different port on the same Mac.
- Swap the cable if you have a spare. USB-A and USB-C cables both fail at the connector end far more often than people expect.
- Listen to the drive. A spinning hard drive should spin up within a few seconds. If you hear nothing, the drive may not be receiving power.
If you're using a bus-powered drive (one that draws power from the USB port rather than a wall adapter), some Macs won't supply enough current through a hub. Direct connection fixes this immediately.
Step 2. Check Finder Preferences
This step surprises people because it takes 30 seconds and they assume macOS wouldn't hide a drive by default. It can.
- Open Finder.
- Go to Finder > Preferences (or Finder > Settings in macOS Ventura and later).
- Click the Sidebar tab.
- Make sure External disks is checked under both the Sidebar and General tabs.
If the drive was already appearing in Disk Utility but not on your Desktop or in the Finder sidebar, this is your fix.
Step 3. Open Disk Utility and Look for the Drive
Disk Utility is where the real diagnostic work begins. A drive that doesn't appear in Finder will often still appear here, which tells you the Mac sees the hardware but can't mount the volume.
- Open Disk Utility (Applications > Utilities > Disk Utility, or search with Spotlight).
- In the top-left corner, click View and choose Show All Devices. This is critical. The default view hides unmounted or unformatted drives.
- Look for your drive in the left sidebar.
If the drive appears but is grayed out: The volume is unmounted. Click it, then click the Mount button in the toolbar. If it mounts, you're done. Open Finder and your data should be there.
If the drive appears but Mount fails: Proceed to Step 4.
If the drive does not appear at all: The Mac isn't detecting the hardware. Go back to Step 1, try a different cable and port, and if it still doesn't show, the drive or its enclosure likely has a hardware fault. See the Bottom Line section.
Step 4. Run First Aid in Disk Utility
First Aid checks the volume's directory structure and repairs what it can. It won't fix every problem, but it resolves a large percentage of unmounting failures caused by improper ejection or minor corruption.
- In Disk Utility, select the drive (the top-level device, not just the volume under it).
- Click First Aid in the toolbar.
- Click Run and let it complete. Do not interrupt it.
- Read the result. If First Aid says the volume was repaired, click Done and try mounting again.
If First Aid reports errors it could not repair, note the exact error message. Common ones include "Invalid B-tree" or "Overlapped extents." These indicate filesystem corruption that may require third-party tools like Disk Warrior or DriveDx, or professional recovery.
If First Aid completes cleanly but the drive still won't mount, the issue may be the file system format.
Computer acting up? Get a real diagnosis. Book a free diagnostic
Step 5. Check the Drive's File System Format
A Mac will mount drives formatted as APFS, HFS+, exFAT, and FAT32 without any extra software. It will not natively write to NTFS (the default Windows format) and may not mount it reliably without a driver.
In Disk Utility, when the drive is selected, look at the information panel at the bottom of the window. It will show the file system type.
- NTFS: macOS can usually read NTFS but not write to it. If the drive isn't mounting at all, try a free NTFS driver like NTFS-3G via Homebrew or a paid option like Paragon NTFS. Alternatively, if the data is accessible from a Windows machine, copy it off and reformat as exFAT for cross-platform use.
- Unknown or blank format: The drive may be unformatted, or the partition table may be damaged.
- Linux formats (ext4, etc.): macOS won't mount these natively. You'd need third-party software.
ExFAT is the most practical cross-platform format if you move files between Mac and Windows regularly. Both operating systems handle it without extra drivers.
Step 6. Test the Drive on Another Computer
This step separates a Mac problem from a drive problem.
- Connect the drive to a Windows PC or another Mac.
- If the drive mounts and is readable, your original Mac has a configuration or driver issue, not a failed drive.
- If the drive also fails to appear on the second machine, the drive or its enclosure has a hardware problem.
External drives consist of two parts: the actual disk inside, and the enclosure with its USB bridge board. The bridge board fails more often than people realize. If you have a screwdriver and some patience, you can sometimes remove the bare drive from the enclosure and connect it directly via a SATA-to-USB adapter to confirm whether the drive itself is healthy.
Step 7. Reset NVRAM and Check for macOS Updates
If the drive works elsewhere but still won't show on your Mac, two quick housekeeping steps can clear stubborn issues.
Reset NVRAM (Intel Macs only):
- Shut down the Mac.
- Press the power button, then immediately hold Option + Command + P + R.
- Hold for about 20 seconds, then release.
- Let the Mac boot normally and test the drive again.
Apple Silicon Macs (M1, M2, M3 series) reset NVRAM automatically at startup and don't need this step.
Check for macOS updates: Go to System Settings > General > Software Update. A pending update sometimes includes storage driver fixes. If you're running an older version of macOS, a known bug may already have a patch waiting.
Common Mistakes
- Pulling the drive without ejecting it first. This is the single biggest cause of filesystem corruption on external drives. Always eject before unplugging, even if it feels unnecessary.
- Running First Aid on a clicking or grinding drive. Mechanical drives that are making unusual noises need professional data recovery, not more read cycles.
- Reformatting immediately without recovering data. Disk Utility will offer to erase an unreadable drive. Don't click Erase until you are certain the data is either backed up or unimportant.
- Blaming the Mac before testing the cable. A two-dollar cable failure produces the same symptom as a three-hundred-dollar drive failure. Always try the cheap fix first.
- Skipping the "Show All Devices" view in Disk Utility. The default view hides a lot. This step is not optional.
Speaking of things that get overlooked: if your important files only exist on this one external drive and nowhere else, that's the real problem to solve after you get through this. A backup and disaster recovery plan doesn't have to be complicated, but it does have to exist before the drive fails, not after.
Bottom Line
Most external drive mounting failures on a Mac are preventable and fixable without special tools. Work through the steps in order: cable and port first, Finder preferences, Disk Utility with all devices visible, First Aid, file system check, cross-platform test, then NVRAM reset. The fix is usually in the first three steps.
If the drive is clicking, grinding, or simply not visible on any computer after swapping cables and ports, the hardware is failing. At that point, data recovery from a professional is the only path that doesn't risk permanent loss.
If you've worked through this entire list and the drive still won't cooperate, or if you're not comfortable opening Disk Utility on a machine with important data, our Mac repair team can take a look in person. We also offer remote support if you'd rather have someone walk through it with you on screen. No drama, just a systematic look at what's actually happening with your hardware.
Computer acting up? Get a real diagnosis.
Fix My PC Store has repaired thousands of machines across West Palm Beach. Free diagnostics, honest pricing, no upsell games.