
How to Safely Clean Dust Out of Your Desktop or Laptop
Dust is one of the most predictable causes of overheating, thermal throttling, and premature hardware failure. This guide walks you through cleaning your desktop or laptop safely, with the right tools and in the right order, every time.
TL;DR: Dust buildup causes overheating, slowdowns, and early component failure. With compressed air, an antistatic brush, and about 20 minutes, you can clean most desktops and laptops safely at home. Do it every 6 to 12 months, or sooner if you have pets or live in a dusty environment.
What You Need
Before you open anything, gather your materials. Using the wrong tools is how people damage components or shock themselves.
For desktops and laptops:
- Canned compressed air (look for a product with a bitterant/bittering agent to discourage misuse, and always use it upright)
- Soft antistatic brush (a clean, never-used paintbrush works fine)
- Microfiber cloth
- Phillips-head screwdriver (usually #1 or #2)
- Plastic pry tool or spudger (for laptops)
- ESD wrist strap or antistatic mat (optional but recommended)
- Isopropyl alcohol, 90% or higher (for thermal paste replacement if needed)
- Thermal paste (only if you are removing the heatsink)
What you do not need:
- A vacuum cleaner. Standard household vacuums generate static electricity. They can kill a graphics card or RAM stick without any visible warning.
- Paper towels. They scratch and leave fibers.
- Water, household cleaners, or anything with silicone.
If your machine is still under warranty, check the manufacturer's terms before opening it. Laptops especially sometimes have warranty stickers over screws.
Step 1: Power Down and Disconnect Everything
Shut down completely. Sleep or hibernate is not enough. Power off, then unplug the machine from the wall. For laptops, power off and disconnect the charger.
For desktops, flip the switch on the power supply to the off position (the "O" side), then unplug the power cable. This drains residual voltage from the system.
Wait two minutes before touching anything inside. Capacitors in power supplies and monitors hold charge after shutdown. You do not need to open the monitor, but the wait is a good habit.
Remove any connected peripherals: USB drives, external drives, monitors, keyboards. Less clutter, less risk of something getting knocked loose.
Step 2: Ground Yourself
Static discharge is invisible and immediate. You can destroy a stick of RAM by touching it without grounding yourself first, and you will not know it happened until the machine will not boot.
The simplest method: touch a bare metal part of the case (unpainted) before touching any components. If you have an ESD wrist strap, clip it to the case. Do this every time you reach back inside after moving around.
Work on a hard, non-carpeted surface if you can. Carpet is basically a static generator.
Step 3: Open the Case
Desktops: Most modern mid-tower cases use thumbscrews on the rear panel. Some use Phillips screws. Remove the left side panel (facing the front of the case). You usually do not need to remove the right panel for a basic dust cleaning.
Laptops: This is where it gets specific to the model. Most modern laptops have a bottom panel held on by Phillips or Torx screws. Some use hidden screws under rubber feet. Remove the feet carefully with a plastic pry tool, not a metal screwdriver, to avoid scratching.
If you are not sure how to open your specific laptop model, check the manufacturer's service manual. Most are available as free PDFs. Forcing a panel that is not fully unlatched is the number one way people crack plastic clips they cannot replace.
For MacBooks and certain ultrabooks, the process is more involved. If you are not confident, our laptop repair team can handle the cleaning professionally without risking the chassis.
Step 4: Assess Before You Blast
Before reaching for the compressed air, look. Note where the dust is heaviest. Common buildup zones:
- Intake and exhaust fan blades
- Heatsink fins on the CPU cooler
- GPU heatsink and fan assembly
- Case intake vents (front, bottom, sides)
- Power supply vents (desktops)
- The vents along the bottom and side of a laptop
If the dust is light and loose, compressed air alone will handle it. If there are thick, matted clumps of dust (common in older machines, pet households, or smoker environments), you will need the brush first to break it up, then the air to clear it.
Extremely heavy buildup around a CPU heatsink sometimes means the thermal paste underneath has also degraded. If the machine was running very hot before you opened it, plan to replace the thermal paste after cleaning. That is a separate process but worth doing at the same time.
Computer acting up? Get a real diagnosis. Book a free diagnostic
Step 5: Clean the Fans First
Fans are the primary dust traps and the first thing to address.
- Hold each fan blade still before spraying. Spinning a fan with compressed air can overspeed it and damage the bearings. Use your finger or a pencil to hold the blades in place.
- Spray in short bursts at an angle, not straight into the hub.
- Use the brush to loosen caked-on dust between blades.
- Follow with another short burst of air.
Do this for every fan in the system: case fans, CPU fan, GPU fans, and the laptop's internal fan.
Step 6: Clean the Heatsinks and Vents
Heatsink fins trap dust in layers that restrict airflow significantly. This is usually why machines overheat even after the fans are cleaned.
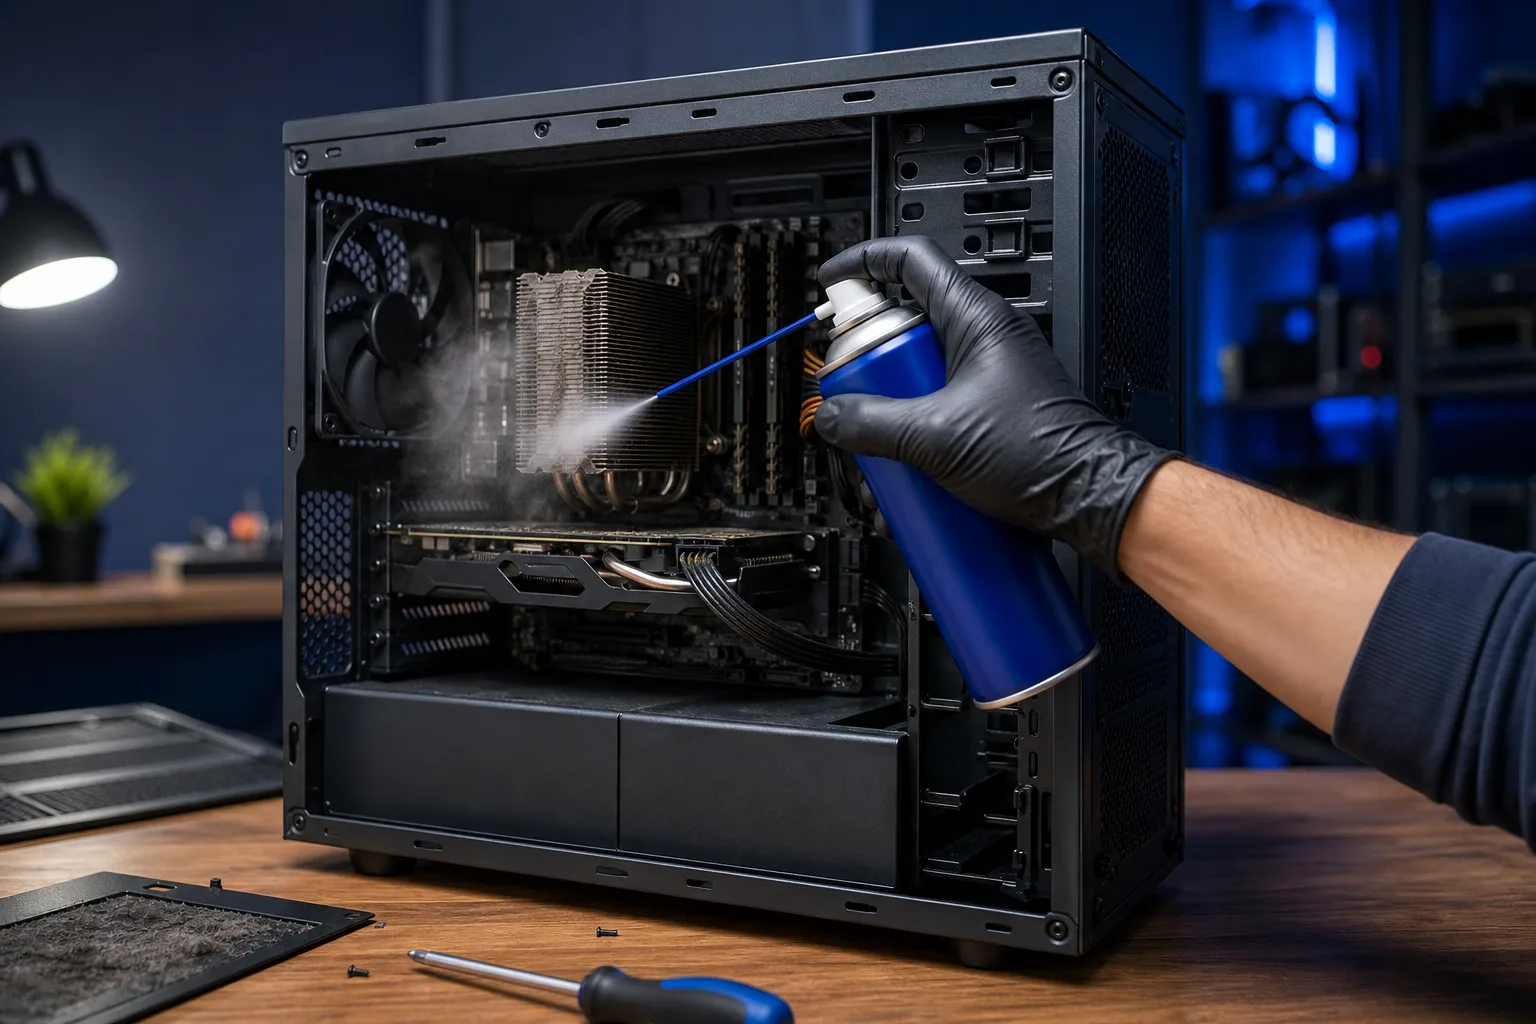
- Hold the compressed air can upright. Tipping it can release liquid propellant that will damage components on contact.
- Spray through the heatsink fins from multiple angles.
- Use the brush to work out dust packed between fins.
- Spray again to clear the debris the brush loosened.
For case vents and laptop vent grilles, spray from the inside out where possible. This pushes dust out the direction it came in, rather than deeper into the machine.
For the power supply in a desktop, do not open it. Spray through the external vents only. Power supplies contain capacitors that hold lethal charge even when unplugged.
Step 7: Wipe Down Surfaces
After the air has cleared, use a dry microfiber cloth to wipe down the inside of the case, the tops of components, and any remaining dust on surfaces. Do not use the cloth on circuit boards or connector pins.
For the exterior of the case or laptop body, lightly dampen the microfiber with isopropyl alcohol. It evaporates quickly and leaves no residue.
If you removed the heatsink to replace thermal paste, clean the old paste off both the heatsink base and the CPU lid using isopropyl alcohol and a microfiber cloth. Apply a small amount of new paste (a pea-sized dot centered on the CPU lid) before reseating the heatsink.
Step 8: Reassemble and Test
- Reseat the side panel or laptop bottom cover.
- Reconnect power and peripherals.
- Power on and monitor temperatures for the first 10 to 15 minutes.
For temperature monitoring, a free utility like HWiNFO or Core Temp will show you CPU and GPU temps in real time. Idle temps should be meaningfully lower than before cleaning. If they are not, the dust may not have been the only issue, or thermal paste replacement is still needed.
If the machine will not boot, immediately power off and check your connections. It is almost always a RAM stick or power connector that got bumped during cleaning.
For machines that were already showing serious thermal problems before cleaning, a more thorough diagnosis may be warranted. Our computer repair team in West Palm Beach can run full thermal testing and address anything the cleaning did not resolve.
Common Mistakes
1. Using a vacuum cleaner. Already covered, but worth repeating. The static risk is real and the damage is permanent.
2. Spraying compressed air at an angle or tilted. Liquid propellant on a PCB is a bad day. Keep the can upright.
3. Letting the fans spin freely while spraying. Overspeed kills fan bearings. Hold them still.
4. Skipping the laptop bottom panel because it looks complicated. The dust inside a laptop is often worse than a desktop because the airpath is so tight. If the bottom panel looks intimidating, bring it in rather than forcing it.
5. Cleaning only the fans and missing the heatsink fins. The fins are where heat actually transfers. Dusty fins mean the CPU or GPU is still cooking even with clean fans.
6. Not replacing thermal paste after removing a heatsink. If you lift the heatsink for any reason, replace the paste. Old paste does not re-seat cleanly.
7. Waiting until the machine is already overheating. Thermal damage is cumulative. By the time a laptop is shutting itself off from heat, the CPU or GPU may have already sustained damage. Dust cleaning is maintenance, not emergency response. If you already have shutdown or throttling symptoms, consider a professional evaluation alongside the cleaning. Remote support can help assess software-side thermal issues before you even open the case.
Bottom Line
Dust cleaning is one of the most cost-effective things you can do to extend the life of a desktop or laptop. It costs almost nothing, takes less than 30 minutes once you have done it a few times, and it directly prevents overheating failures that would otherwise mean a repair visit or a premature hardware replacement.
Set a reminder. Every 6 months for a typical home environment. Every 3 to 4 months if you have pets or the machine sits on carpet. Once a year at minimum for a clean, air-conditioned office.
If your machine is already running hot, the fans are loud, or the performance has noticeably dropped, dust is the first thing to rule out. It usually is the cause. And if you open it up and the situation is more involved than expected, or you are not comfortable doing this on a machine you cannot afford to damage, schedule a repair and let us handle it.
Computer acting up? Get a real diagnosis.
Fix My PC Store has repaired thousands of machines across West Palm Beach. Free diagnostics, honest pricing, no upsell games.
Frequently asked questions
How often should I clean dust out of my computer?
Every 6 to 12 months is a reasonable baseline for most home environments. If you have pets, keep the machine on carpet, or work in a dusty area, shorten that to every 3 to 4 months. Check the intake vents periodically. If you can see a visible layer of dust on the grille, it is time.
Can I use a regular vacuum cleaner to remove dust from my PC?
No. Standard household vacuums generate static electricity that can instantly damage RAM, GPUs, and other sensitive components without any visible sign. Use canned compressed air and an antistatic brush only. The damage from a vacuum is usually permanent and often shows up days later, making it hard to trace the cause.
Is it safe to clean dust out of a laptop myself?
It depends on the model and your comfort level. Most laptops with a removable bottom panel can be cleaned safely if you work carefully and look up the service manual first. Ultrabooks and MacBooks have tighter assemblies with more fragile connectors and clips. If you are not confident, having a technician do it is less expensive than replacing a broken hinge or snapped ribbon cable.
My computer still runs hot after cleaning the dust. What else could cause it?
Degraded thermal paste is the most common secondary cause. If the heatsink fins were packed with dust and the machine has not had fresh paste in several years, the paste between the CPU and heatsink may have dried out and is no longer transferring heat effectively. Replacing the thermal paste is a straightforward fix that often drops temperatures significantly.
Will cleaning the dust void my warranty?
It depends on the manufacturer. Some warranties are voided the moment you open the chassis, while others explicitly allow user-serviceable components. Check your warranty documentation before opening anything. For laptops still under warranty, it is usually safer to let an authorized service provider handle the cleaning.
How do I know if my computer is overheating from dust before I open it?
Common signs include the fans running louder or more constantly than usual, the machine feeling hot to the touch on the bottom or sides, unexpected shutdowns during demanding tasks, and noticeably slower performance during normal use. You can check CPU and GPU temperatures with a free tool like HWiNFO before opening anything to confirm whether heat is the issue.